TL;DR
Three ideas before you begin
- Choose tools and plans by job and usage rules
- Use the official delivery entry in the dashboard
- Provide useful diagnostics without exposing credentials when seeking help
Before you start
Prepare the inputs
- Prepare an email address that can receive verification and order messages
- Confirm your region, display language, and billing currency
- Define the job to solve and expected number of users
Step 1
From “Complete account and preferences” to “Compare tools and limits by job”
To produce “A clear first-use flow from account and subscription to secure access and support”, make “Complete account and preferences” and “Compare tools and limits by job” a reviewable starting point. Every later filter and judgment should preserve this scope.
- 1.1
Complete account and preferences
Register and verify email, then check language, region, and currency because they affect content, pricing, and availability.
- 1.2
Compare tools and limits by job
Start with the use case, then compare term, quota, devices, delivery method, and refund rules rather than price alone.
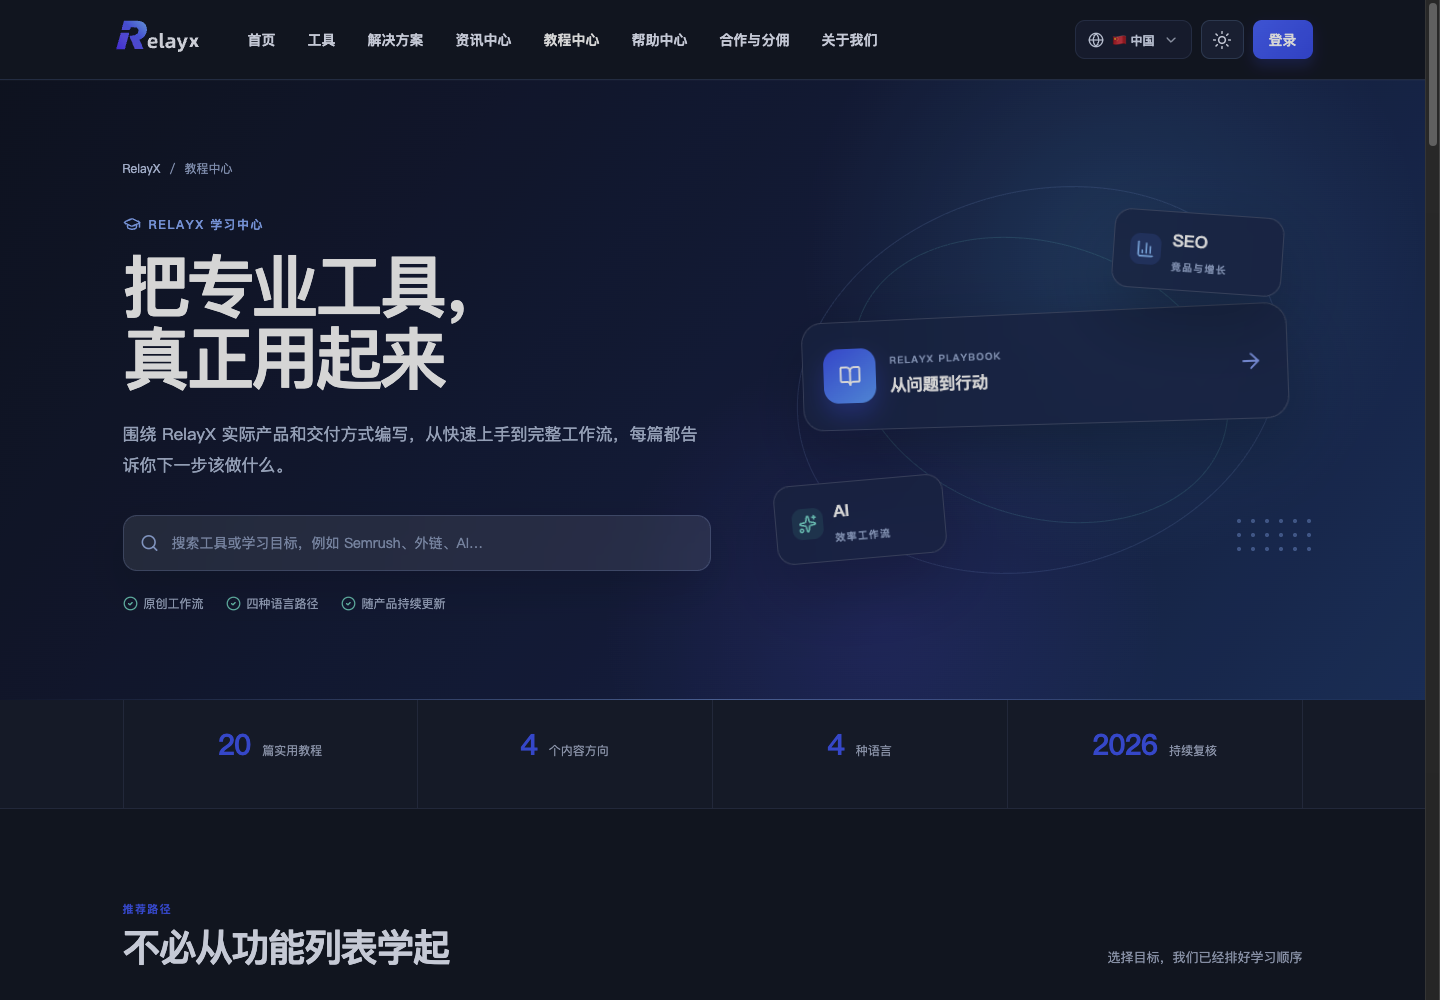
Choose guides and tools by task instead of browsing products blindly. Markers- 1 Learning Center entry
- 2 Search by task
- 3 Recommended learning paths
Open the Learning Center, then search by task or choose a learning path. Confirm tool rules before subscription, access, and the first task.
Source: RelayX local learning center
The account works, locale and region are correct, and the selected plan matches the job and team size.
Step 2
“Complete the order and check status”, then “Access only through official in-product entry points”
Keep only the evidence needed for “Complete the order and check status” and “Access only through official in-product entry points”. Record why each filter changes so the result remains reproducible instead of becoming an unexplained screenshot.
- 2.1
Complete the order and check status
Before payment, recheck product, term, amount, and delivery notes, then confirm status from orders or subscriptions.
- 2.2
Access only through official in-product entry points
Launch the tool or install the extension according to delivery instructions and avoid unknown forwarded links, files, or shared passwords.
Order status, validity, device limits, and the official access entry are confirmed.
Step 3
“Read quota and security rules first” and “Ask for help with complete but redacted details”
Do not stop at tool output. Use “Read quota and security rules first” and “Ask for help with complete but redacted details” to verify quality, limitations, and ownership so “A clear first-use flow from account and subscription to secure access and support” becomes actionable.
- 3.1
Read quota and security rules first
Before use, confirm daily or monthly quota, concurrent devices, project retention, and prohibited actions to avoid accidental limits.
- 3.2
Ask for help with complete but redacted details
Provide product, last four order characters, time, browser, error message, and reproduction steps, but never passwords, cookies, tokens, or full payment details.
You know where to review the subscription, how to access safely, and how to submit an effective support request.
WHO · HOW · WHY
How this guide was written and reviewed
- Who
- Independently written and manually reviewed by the RelayX Editorial Team, with update and capture dates shown on the page.
- How
- Use least privilege, recoverable actions, and current product state as the baseline. Verify source, version, backup, and rollback paths before installing, authorizing, or deleting anything.
- Why
- The goal is not to restate product features but to help you produce “A clear first-use flow from account and subscription to secure access and support”. The workflow is organized around that outcome with checkpoints, limitations, and next actions.
Interface captures come from official accessible product pages or the current browser interface. Each appears under its matching step with numbered controls and data points. When real functional UI cannot be publicly verified, the guide says so instead of using a marketing homepage as filler. No third-party tutorial text or imagery is reused; third-party brands and interface rights remain with their respective owners.